Woodburning Tips:
The Universal Point - a.k.a. the Chisel Tip
One of the most commonly used woodburning tips is the Universal Point. It's named the universal point because it can pretty much do everything any other tip can do.
But just because it can do everything does not mean it's the easiest to use for everything.
Like all tips, this one has it's pros and cons - which I'm giving you right now.
Want To Learn How To Wood Burn?


Courses are now available on the Burn Savvy YouTube channel membership!
Go see which level suits YOU best. ⇣
Universal Point Features
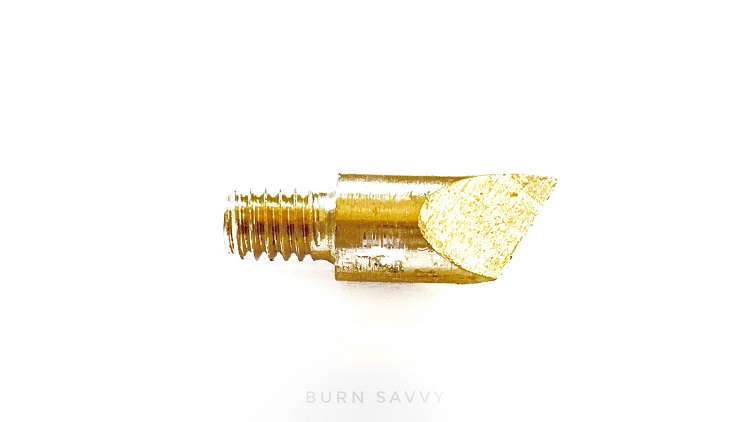
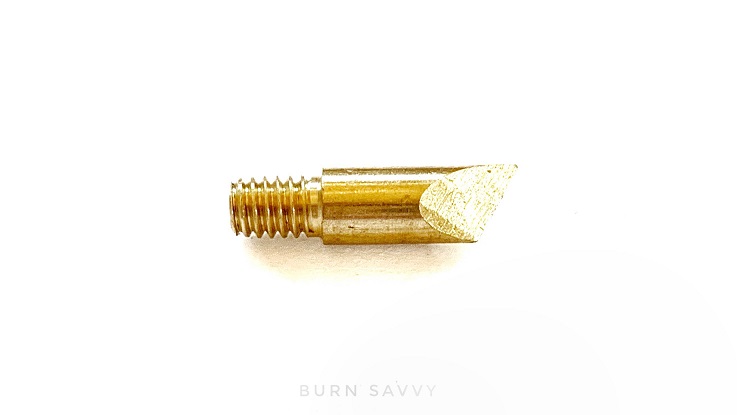
Like most solid point tips, these are brass colored, screw-in tips that come with almost every basic solid-point woodburning machine out there.
These are the tips that usually come already slipped into place and ready for you to use.
Some call this one the chisel tip because... well, look at it. It looks like a chisel.
And it's the one most of my woodburning students start out with.
What's the difference between the universal point and it's sister the mini universal?
Just the obvious.
You can get into smaller areas with the mini universal point and the regular sized universal point covers more space.
Get a free download of all the top used woodburning tips and their best uses here!
What I love about the Universal Point
This tip - a.k.a. the chisel tip - is great for straight lines.
It's also an excellent tip for shading, especially large areas or areas with a straight edge.
I also love to use this tip for bold, large, block lettering. Smaller block lettering takes some practice.
What's Okay About it
It doesn't really make "dots" that are round. But it does make a cool triangular pattern when you go for a stippled look.
What Bugs Me
I don't love it for making circles or rounded patterns. But if you turn the tip upside down, that point works pretty well for fine curved lines.
So it works. But it takes a lot of effort.
Cursive is even harder. But again, this tip can do very fine curved lines when turned upside down.
If you want to do cursive and rounded corners, definitely practice on a scrap piece of wood first.
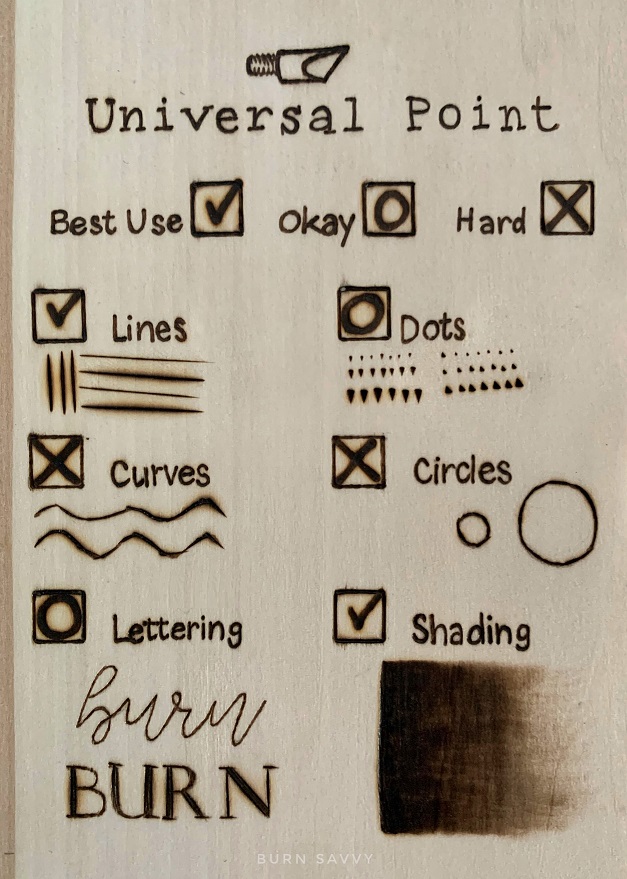
Quick View:
Universal Point Uses
Best Uses
- Straight lines
- Shading
Okay Uses - Not the easiest
- Dots
- Lettering
Hard Uses - choose a different tip
- Curves
- Circles
More Woodburning Tips
Of course, there are other tips you can use that might be easier for you to use.
In fact, I cover 10 of the most common woodburning tips and their uses.
For a look at all the solid-point woodburning tips, have a peek at this article that is just waiting to satisfy your burning curiosity. (Get it? Burning? Heh, heh.)
Burn Savvy Home > Woodburning Tips & Their Uses > Universal Point
Want to seriously up your pyrography game?
I'm spilling my pyrography secrets. Don't miss out on...
- Your FREE guide to woodburning tips & their uses
- Helpful tips, hacks & articles
- First dibs on upcoming courses
- Notice of retreats, challenges, and other pyrography events
- and so much more coming!
So go ahead. Subscribe. Consume. Enjoy.
You deserve it.
⇣ Enjoying your FREE pyrography tips & techinques? ⇣
I am delighted you find them helpful!
If you want some easy ways to give back, here are some ideas that also help YOU level up YOUR wood burning game...
- Watch my YouTube videos (that's totally FREE).
- Buy your woodburning products through my affiliate links which throw me a dime or two at zero extra cost to you (read about affiliate links here).
- Take the pyrography courses that I've poured my heart and soul into helping you burn like a boss!
- Join in the woodburning retreats - that's really like giving back to yourself, actually. ;)
Thanks for helping me keep creating free, delightful, and helpful woodburning content for YOU and pyros like you.
Burn Savvy Home > Woodburning Tips & Their Uses > Universal Point