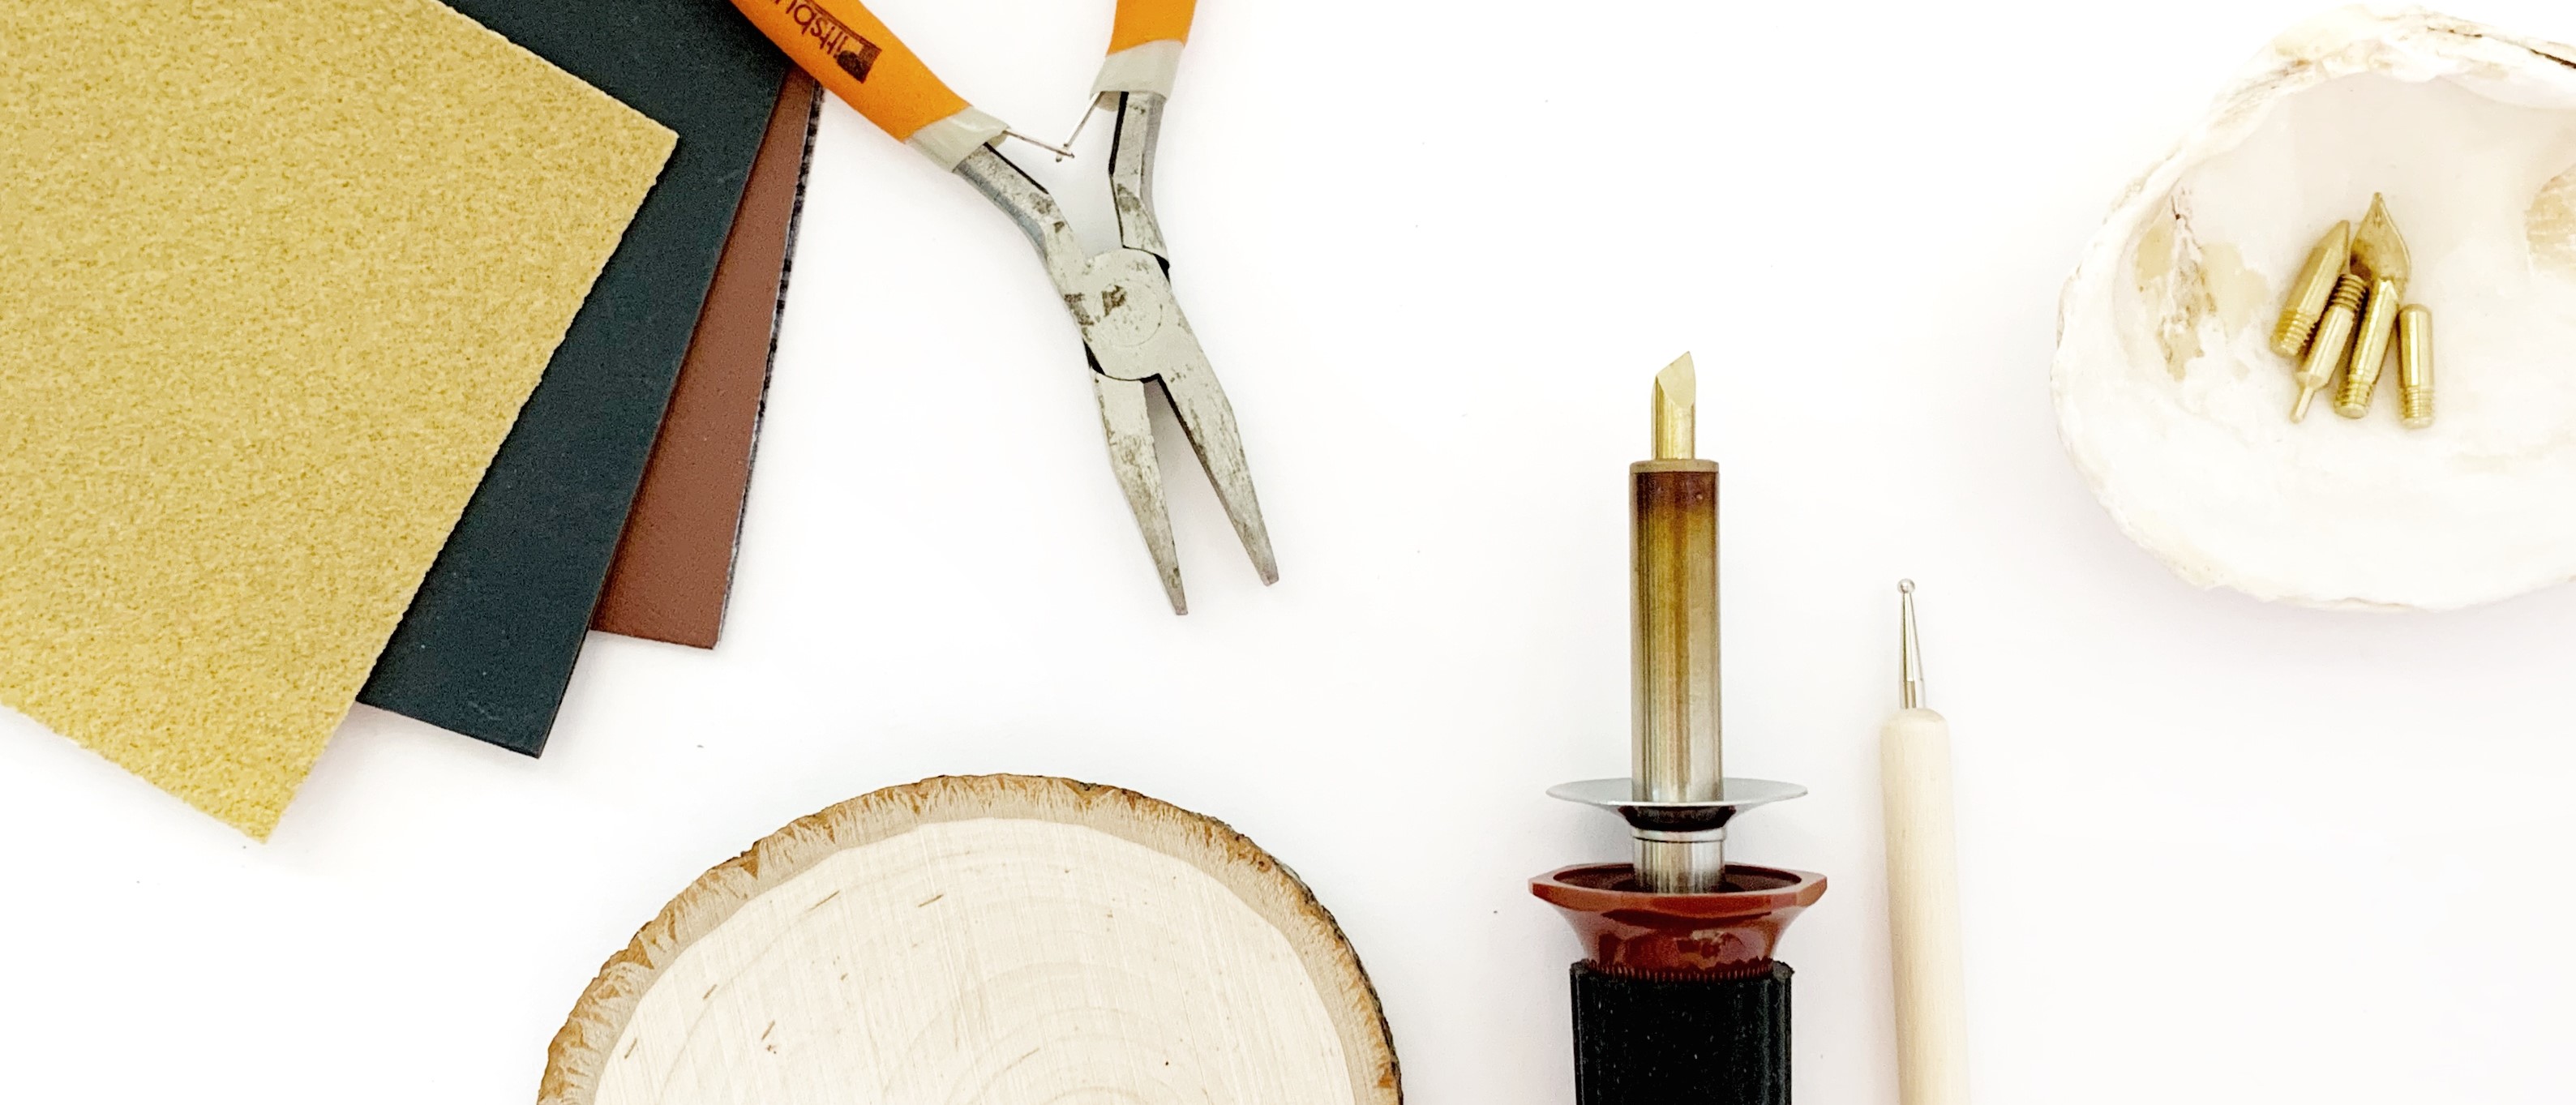
5 Wood Burning Tool Must-Haves That are NOT Burners
* Plus Bonus Tools *
When I first started, the only wood burning tool I knew I needed was a burner. But as I came across snags and hang-ups, I slowly discovered a few things that freed the worries from my pyrography art making process.
How about you? What's in your wood burning arsenal?
I'm about to deliver up the 5 must-have tools (plus a handful of others) I wish I'd known about when I first started wood burning art.
Want To Learn How To Wood Burn?


Courses are now available on the Burn Savvy YouTube channel membership!
Go see which level suits YOU best. ⇣
Disclosure: This post contains affiliate links. If you buy something through them they throw me a small commission at no extra cost to you. I believe in these products so you know you are in good hands. ;) Plus it helps me to keep making *awesome* free content for you (learn more). I appreciate your support!
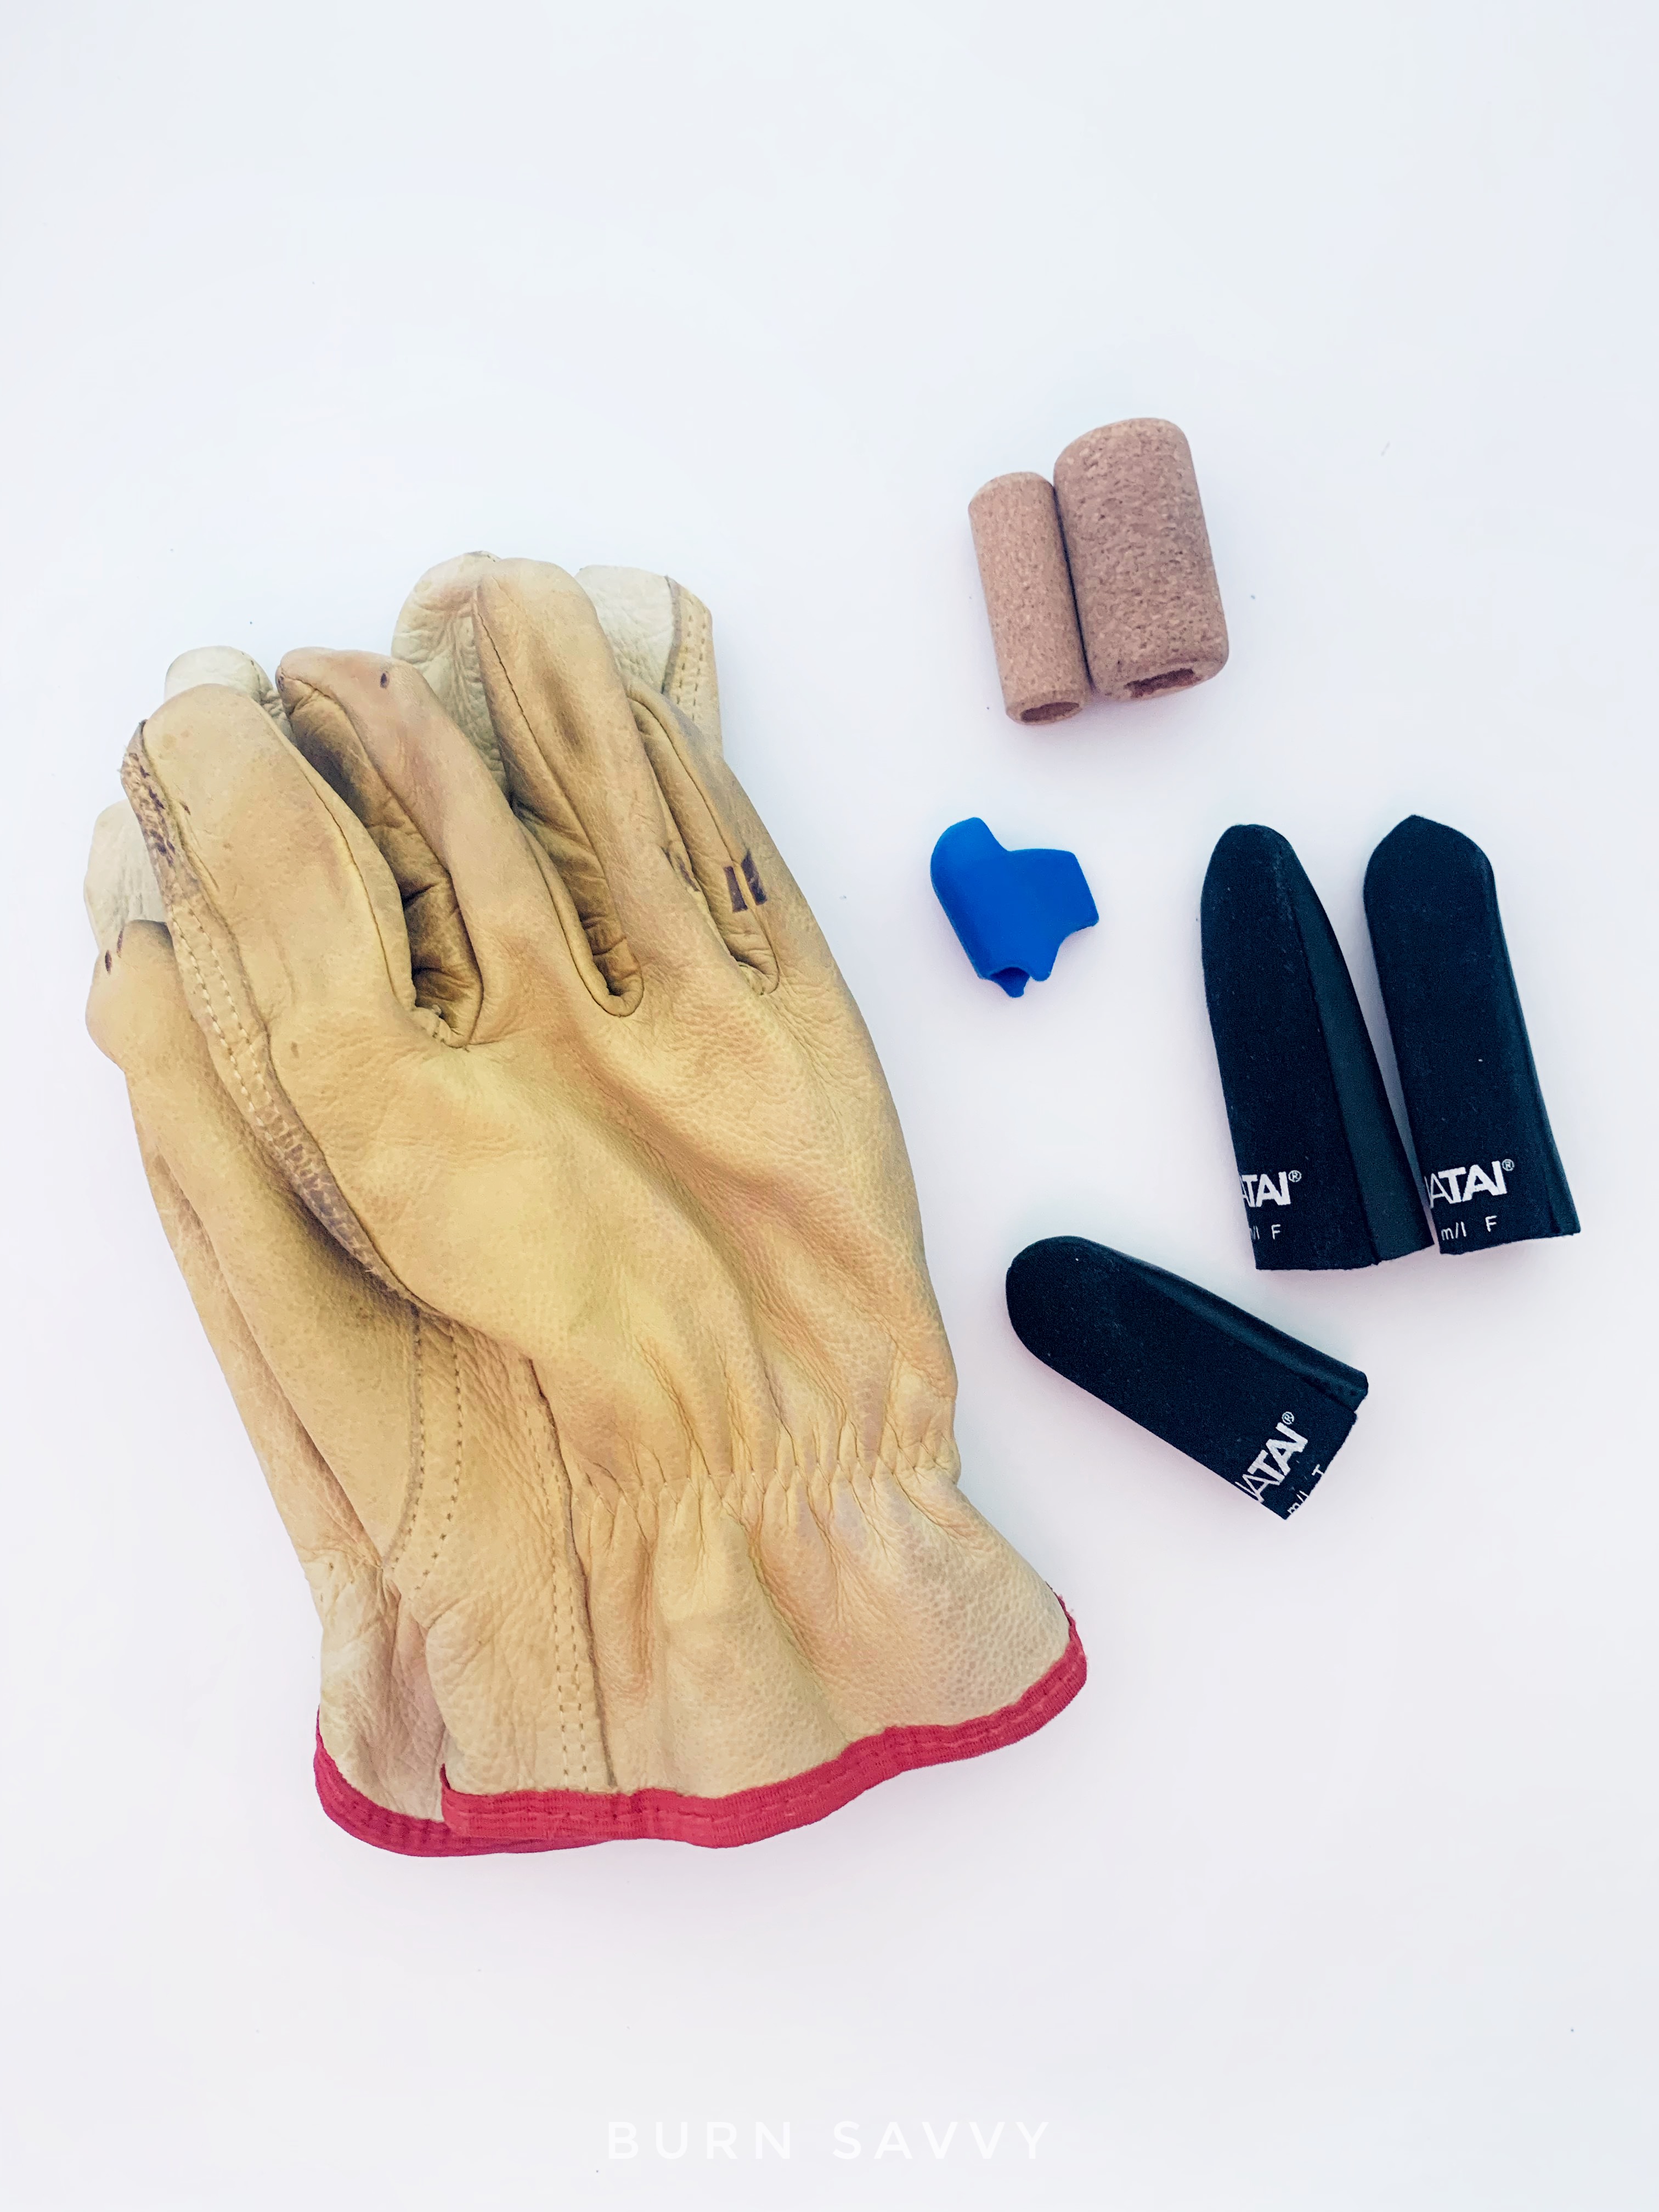
1. PLiers or Tweezers
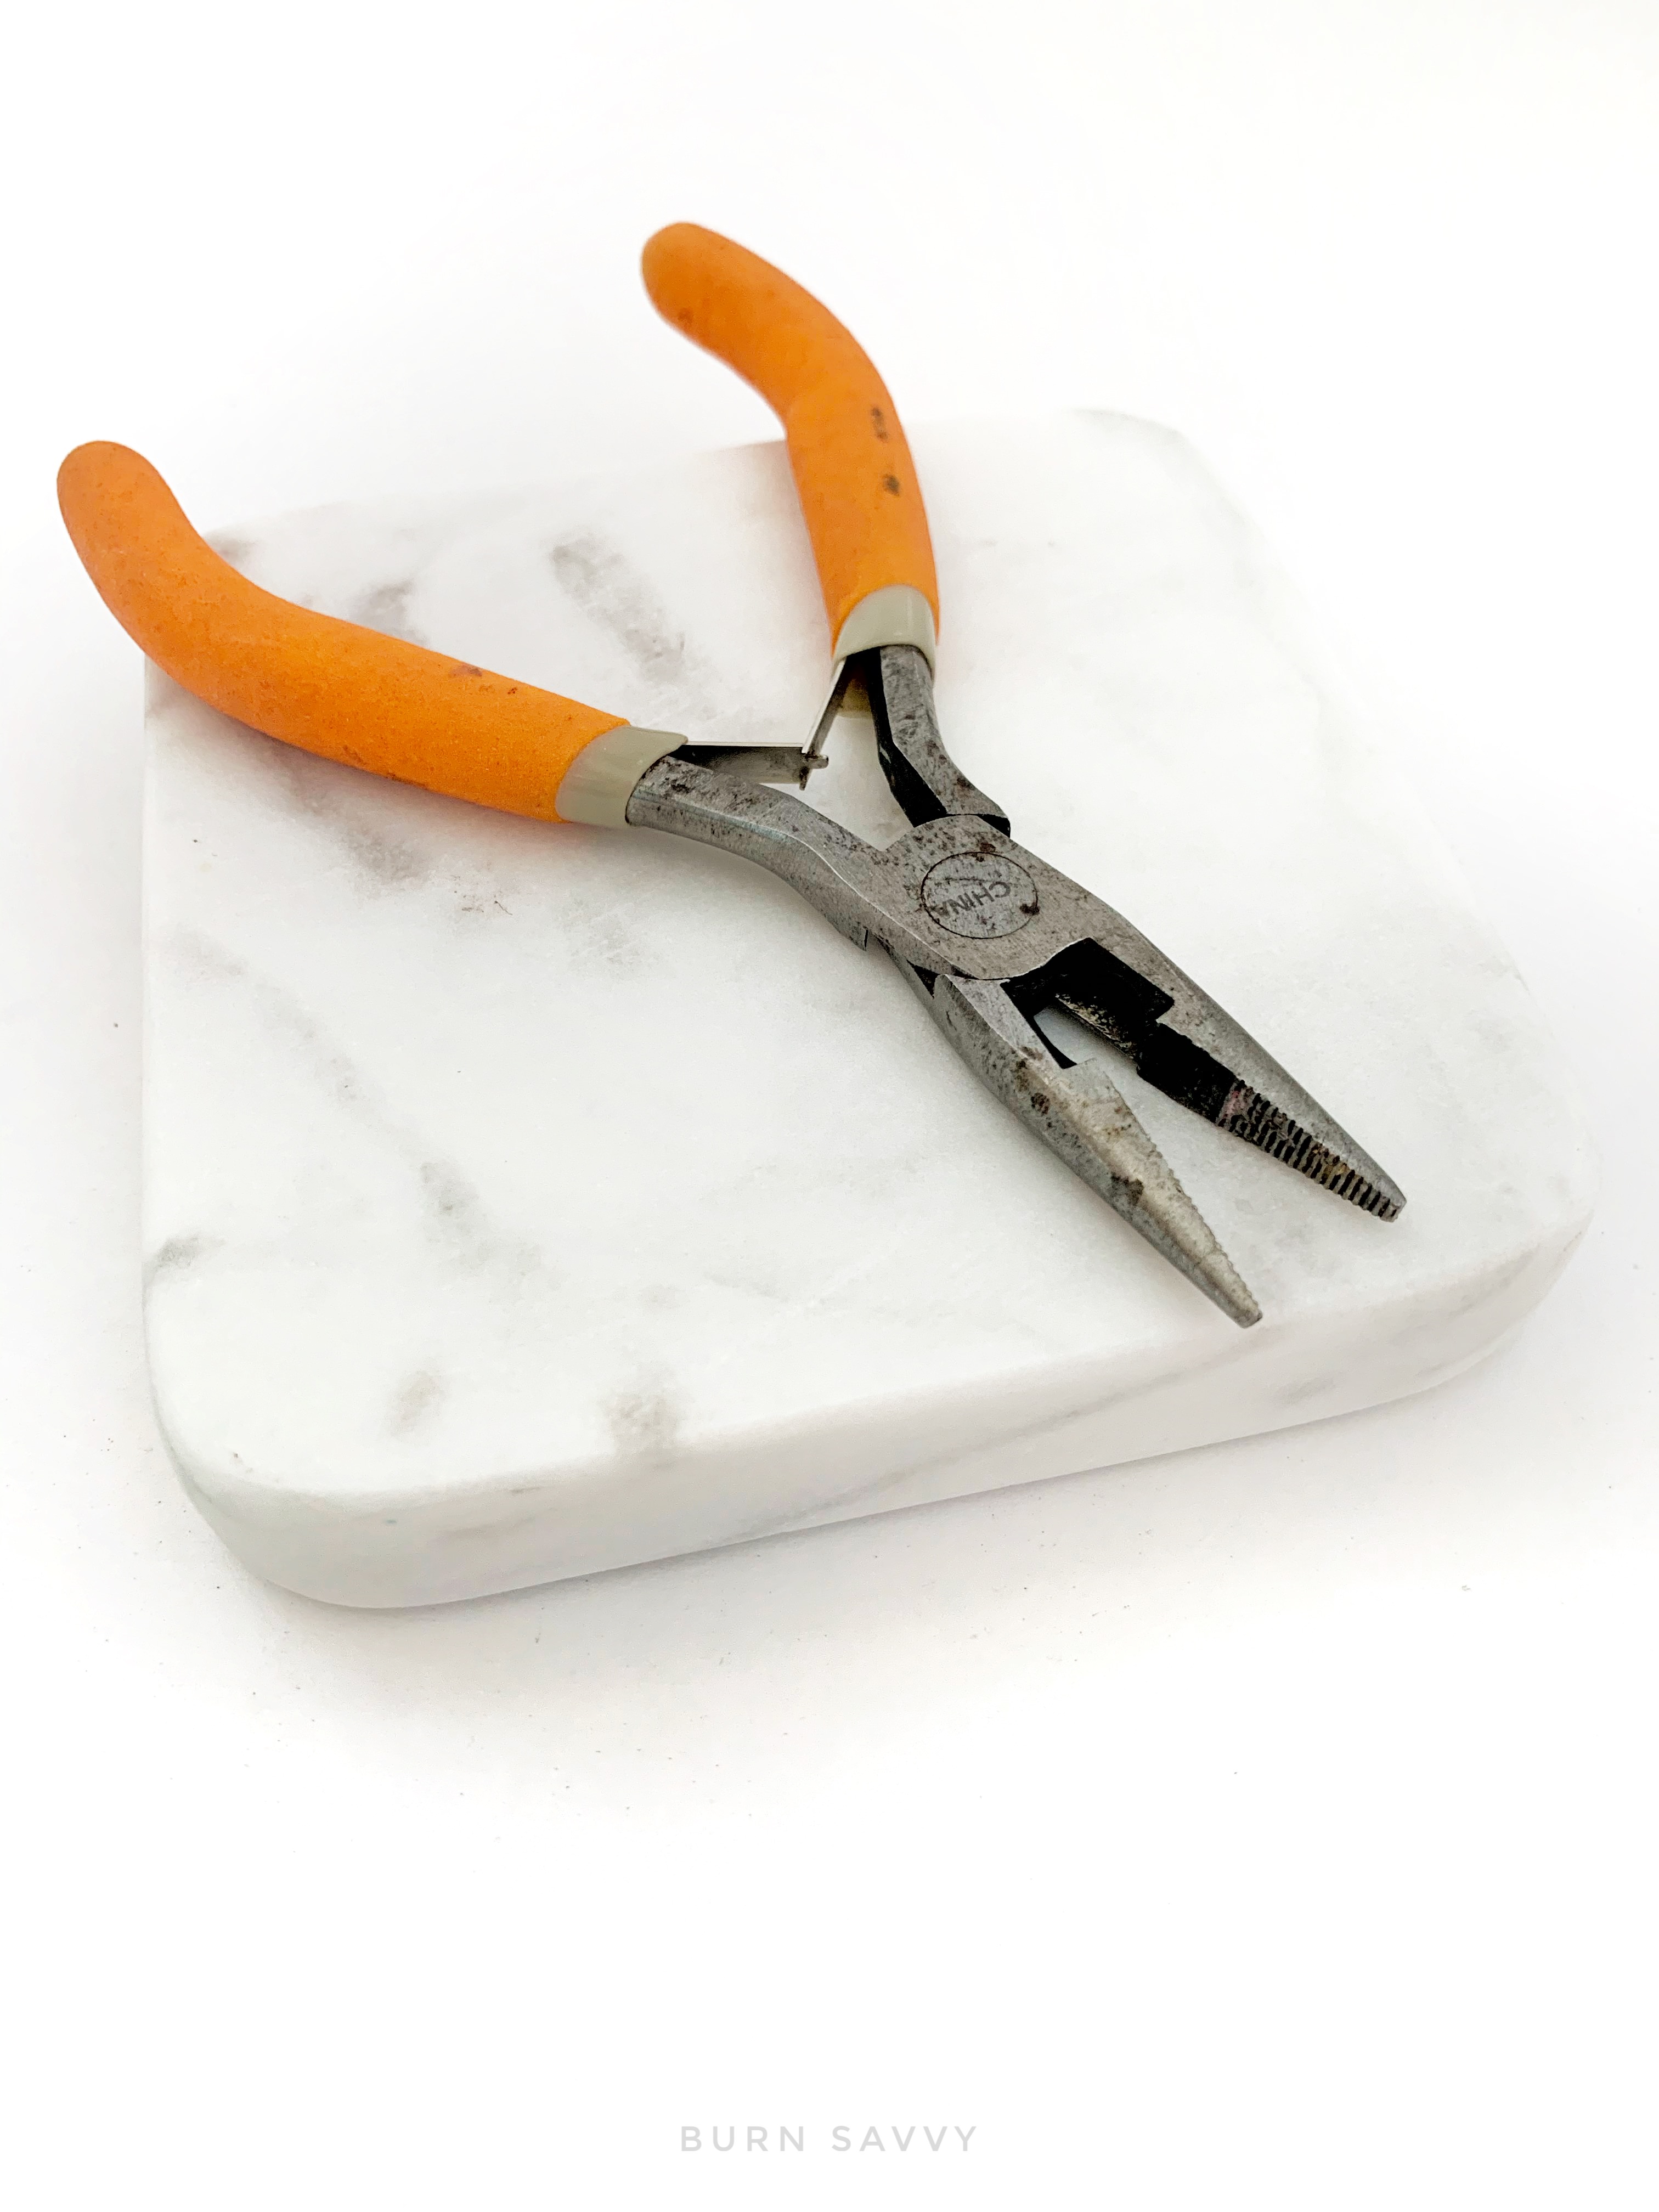 Chrome Vanadium Pliers with TEETH work best!
Pliers for the solid-point burners – tweezers for the wire-nib burners.
If you’ve got a solid-point wood burning tool, pliers will save your pretty little hands.
When you’ve got a hot wood burning tool and you want to switch points, you don’t have to wait fooooreeeeveeer for the burner to cool down.
You simply turn off your burner long enough to gently twist the point outta there with your handy little pliers and screw a new point in.
I would choose pliers that are made of chrome vanadium steel. They're stronger and more heat resistant.
Where To Buy:
TIP: I usually start twisting the tip back in by hand to make sure it doesn’t cross-thread. But once it makes contact with that hot burner, your point will start to heat up fast. To save your precious fingers from becoming your next pyrography canvas, snag your pliers again and gently twist that new point in until its firm... not too tightly though – don’t strip your wood burning tool!
BONUS TIP:
When you use pliers on a hot point, the pliers also heat up. And fast. I keep a stone coaster on hand to give my hot pliers a safe space to park when I’m done.
 Wood Burning Tweezers
Tweezers serve the same purpose, just for wire-nib tools.
Yes, wire-nibs cool off faster than solid-points, but sometimes the base of the nib hold enough heat to be painful pulling it out.
Simply switch your machine off, grip the base of your nib with your tweezers, and gently pull (or if you’re a wimp like me, pull less gently) that hot little nib out of your pyrography pen.
Then simply place the new nib in your burning pen and you’re ready to burn again!
If you buy your wire-nib wood burning tool in a kit, chances are the tweezers are included.
But if you buy the machine and pen a la carte, you’ll have to go find those tweezers to add to your shopping cart.
2. Small Dish
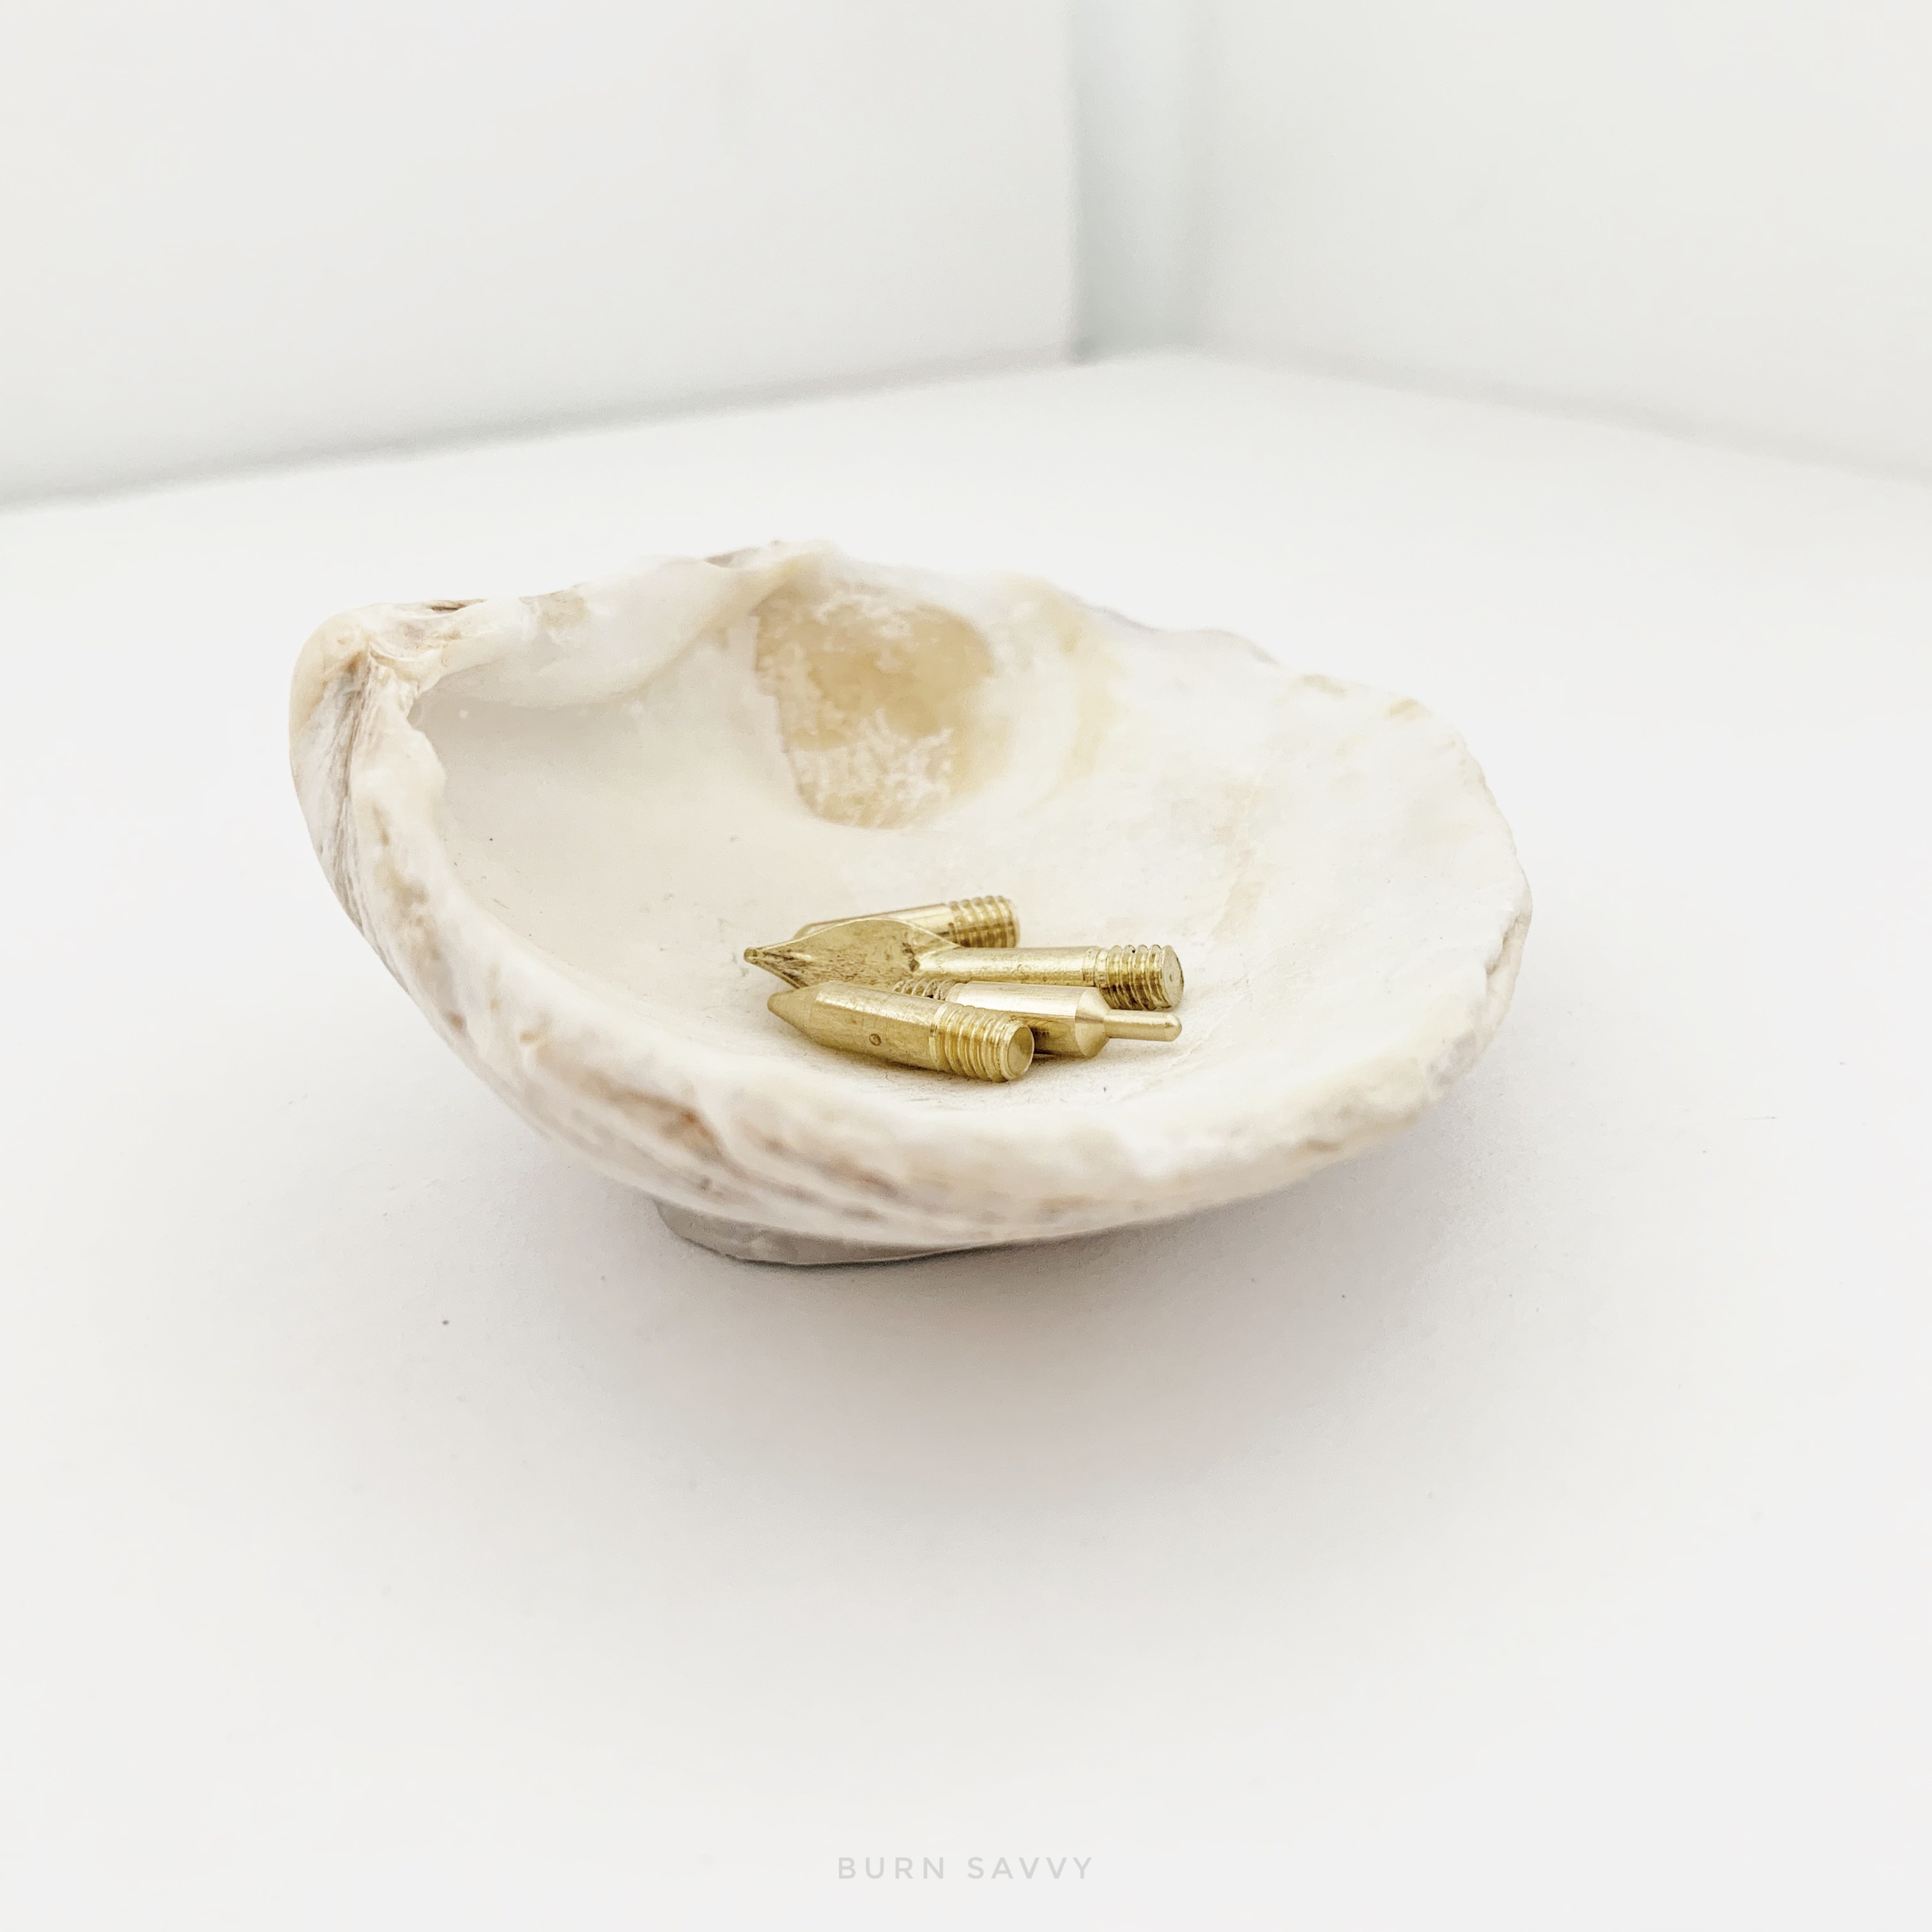 |
Now that you’ve switched out those hot points and nibs, where are you going to put them?? Don’t do what I did starting out. Your desk will curse you. A dish is such a no-brainer solution I felt silly for not thinking of it on my own! Plus, when you have a visible place to keep those hot tips AND safely move them out of the way, you don’t accidentally set your arm down on one as you begin burning again [ouch… ask me how I know]. What kind of dish should you use? Anything heat safe - ceramic, porcelain, stone, clay, or metal dishes. Try a a trinket tray, jewelry dish, ring dish, a fairly flat dipping bowl, tea cup saucer, whatever! Where To Buy: |
My Opinion:
Bowls are annoying. Small but fairly flat dishes with a
lip are best. Then your points don’t just roll right off onto your
table, but they also aren't hard to fish out if you have more than one
point in your dish.
Me? I use an old seashell.
I put a ring of hot glue on the bottom to keep it from rocking when I placed tips in there. Works like a charm and I love how it looks on my studio table.
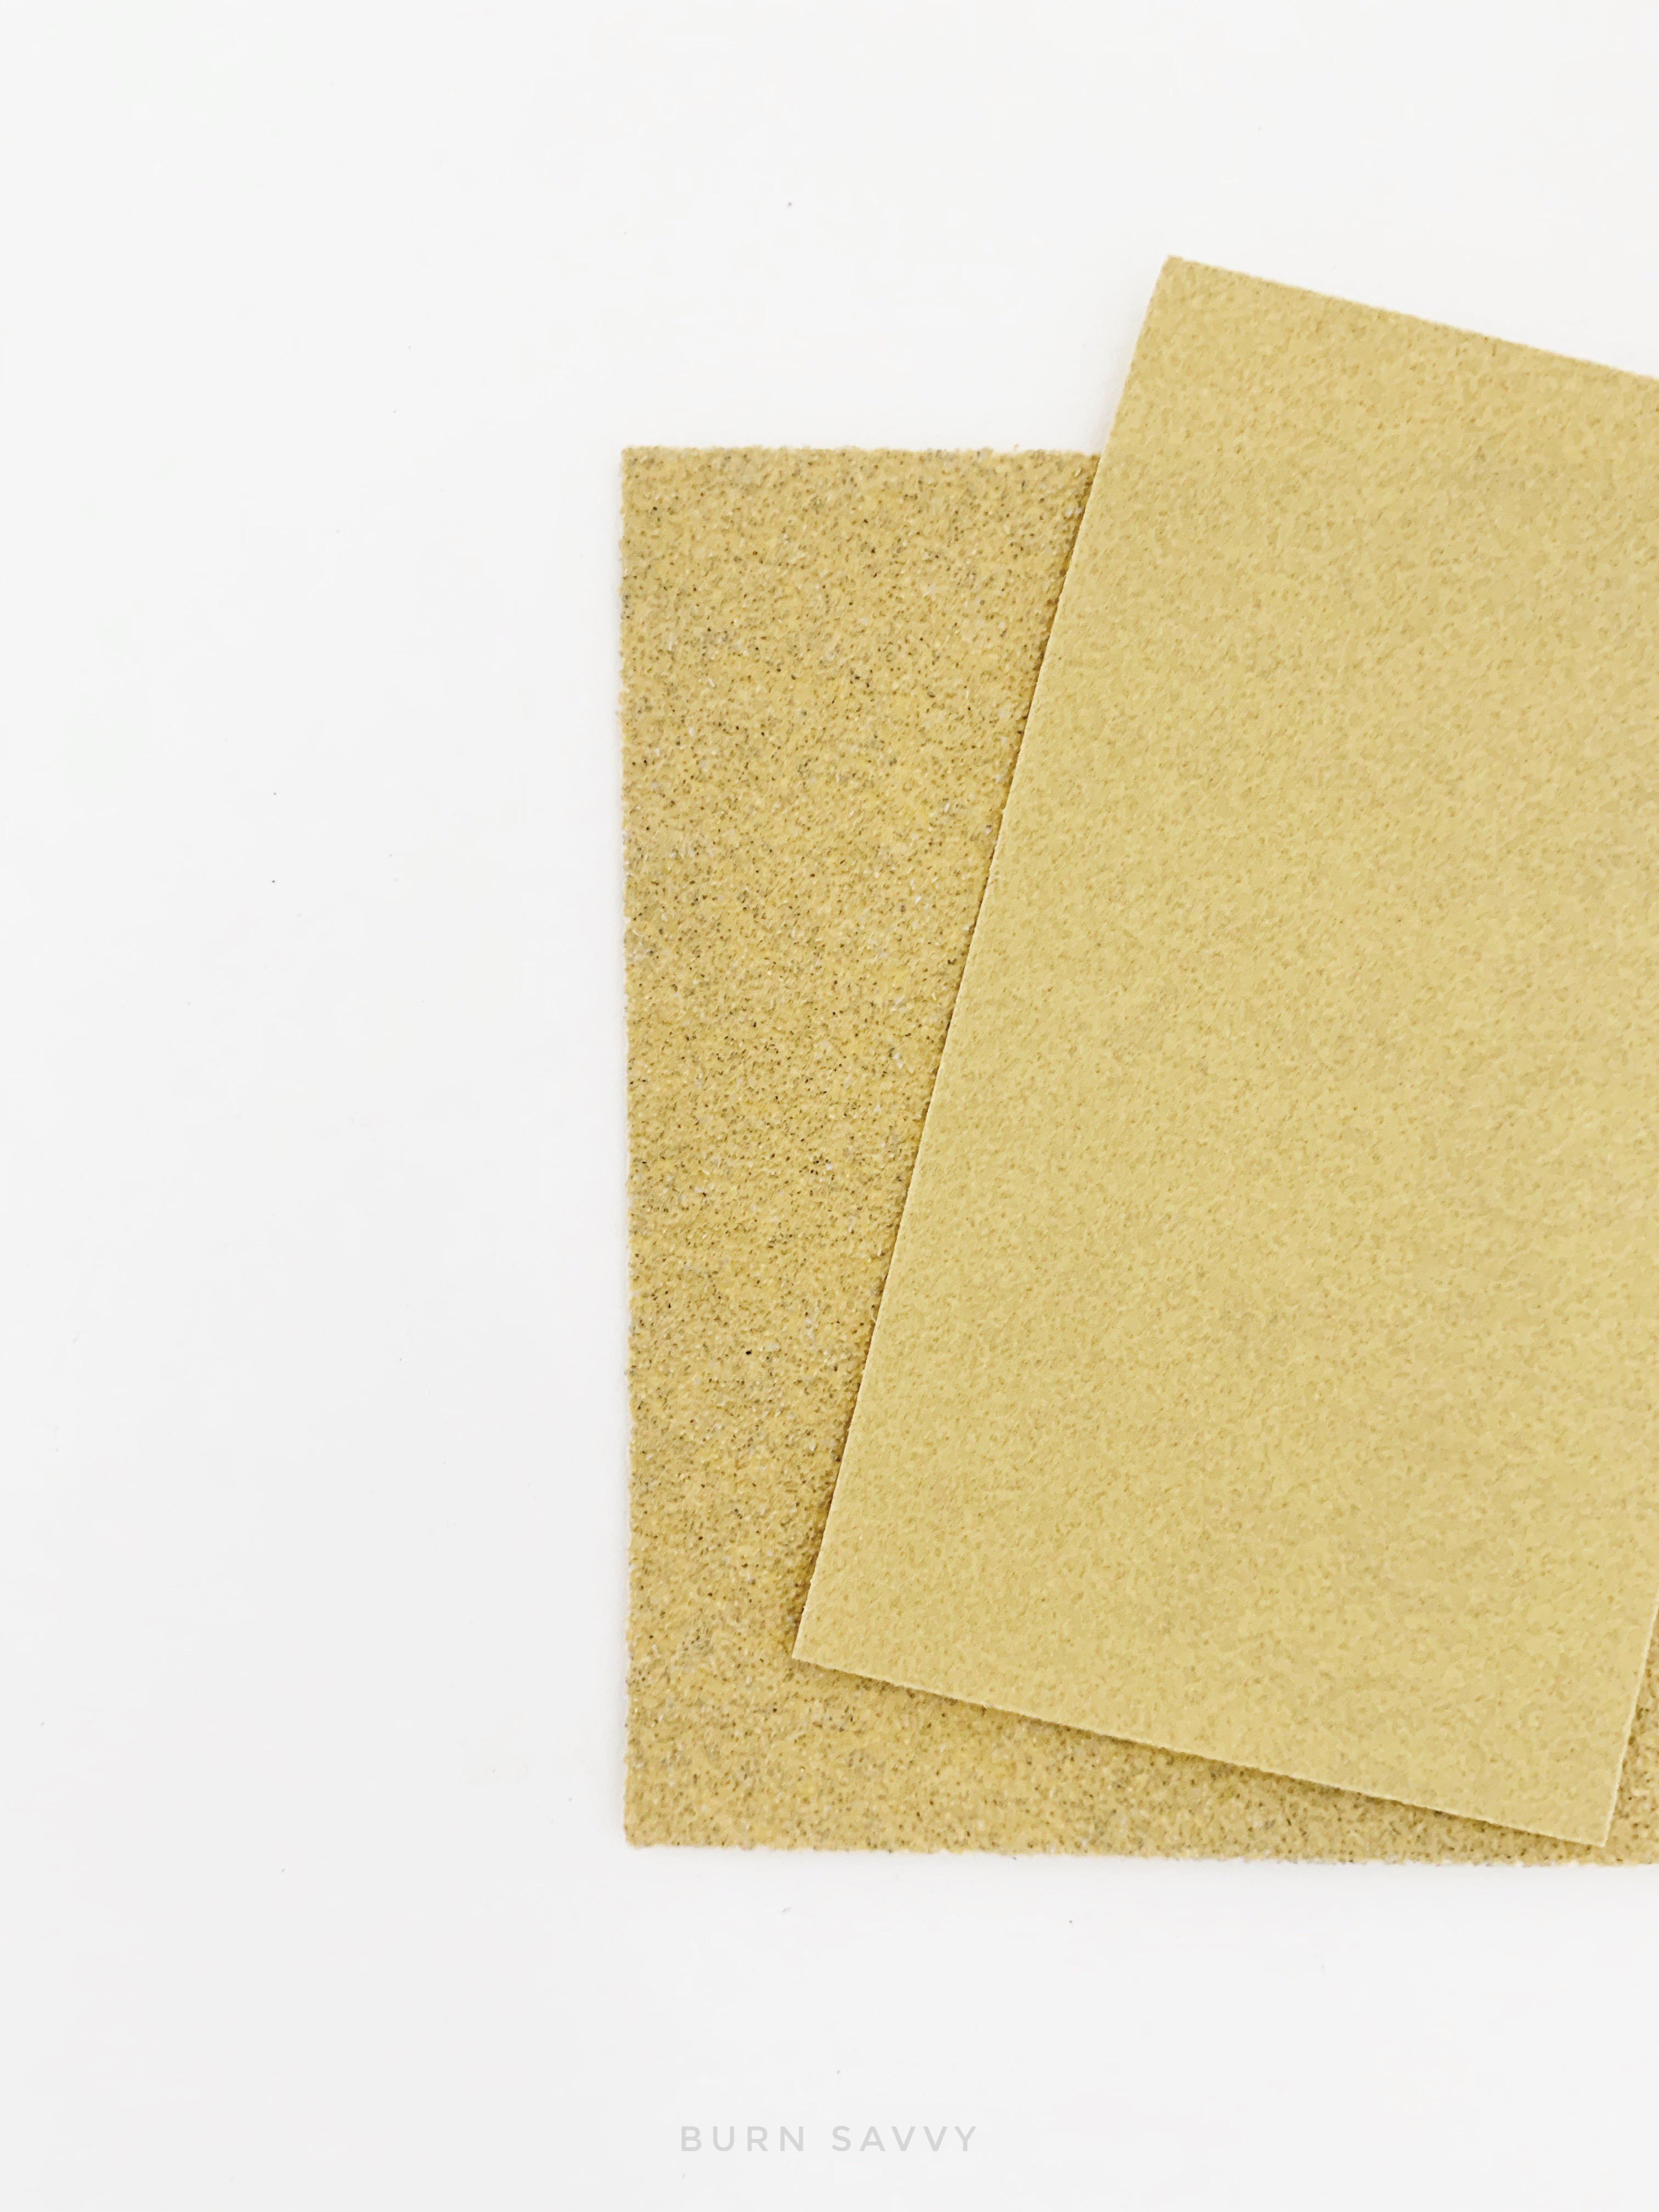
3. Sand Eraser - a.k.a. “ink eraser”
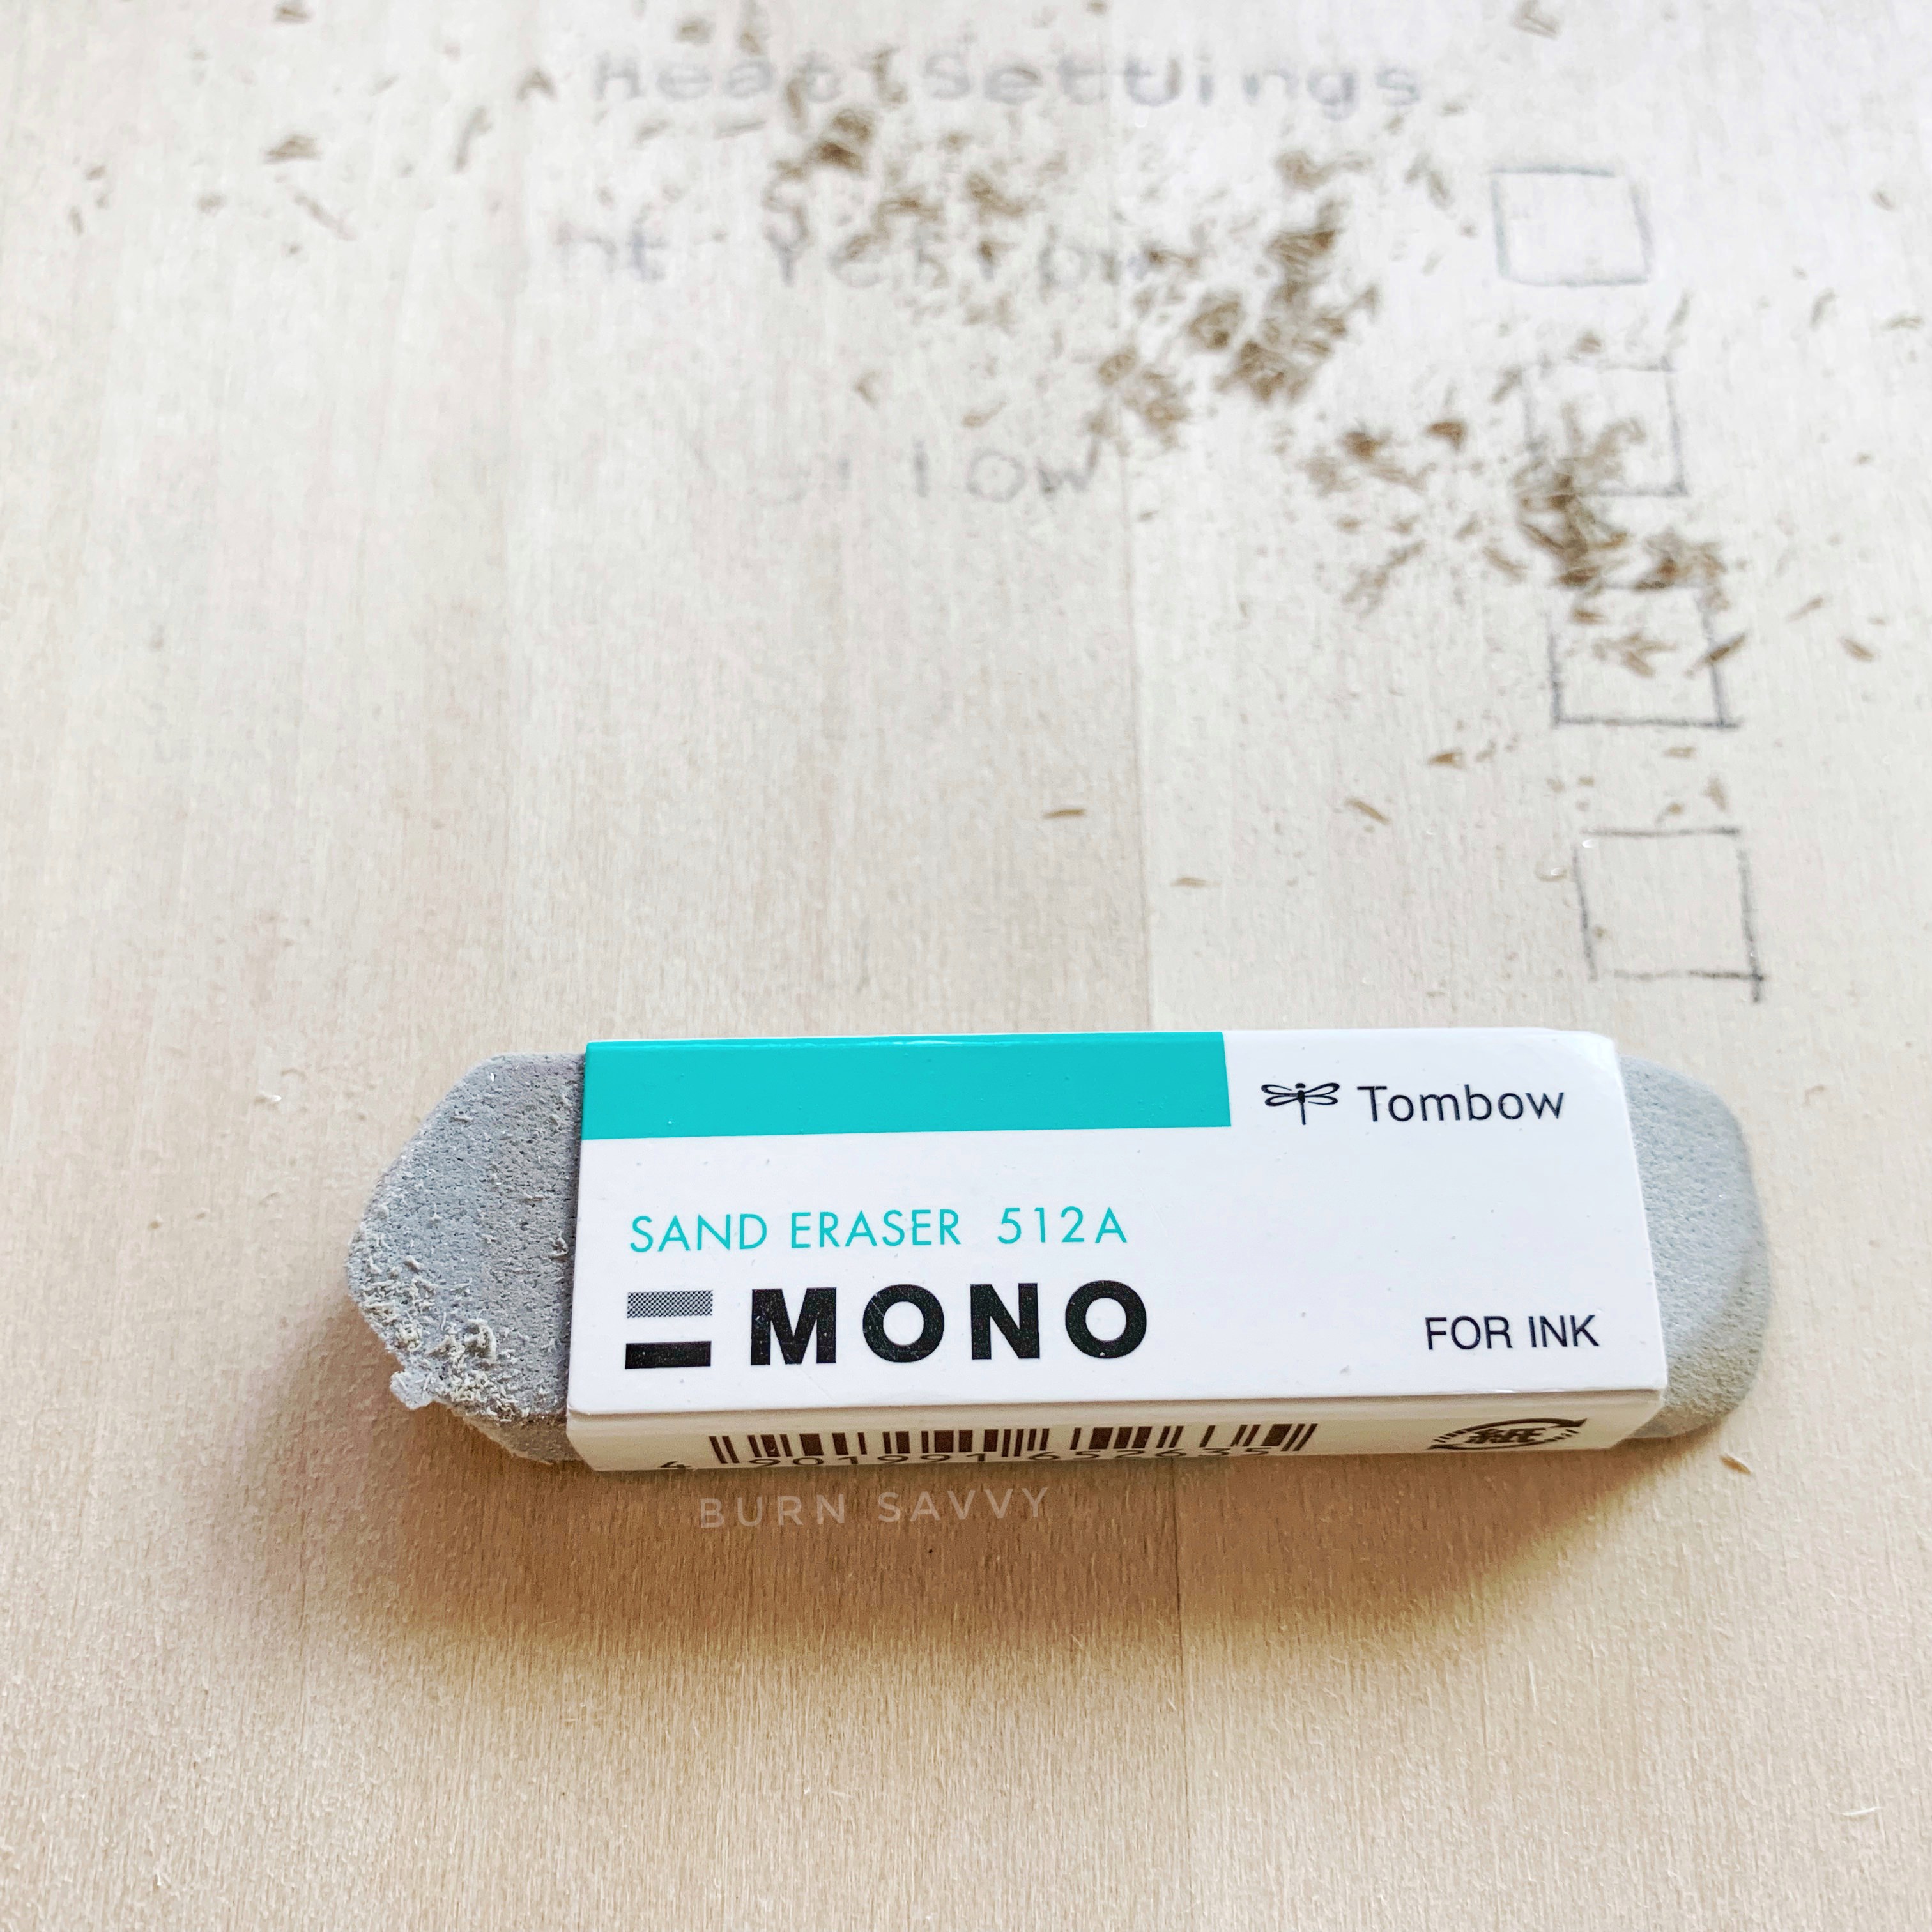
Most pyrographers sketch or trace a design onto the wood piece before they burn.
But if you've ever tried to erase graphite from wood - whether it came from your pencil or tracing paper - you KNOW why you need this.
It seems like sandpaper isn't fine enough to rub that nonsense off. And a rubber art eraser - even with a truckload of elbow grease - STILL isn't rough enough to really clean those marks off the wood.
Some ink erasers have tougher rubber, which is good for... well, ink!
But the sand eraser is the perfect combination for removing those pesky lines from your wood.
Where To Buy:
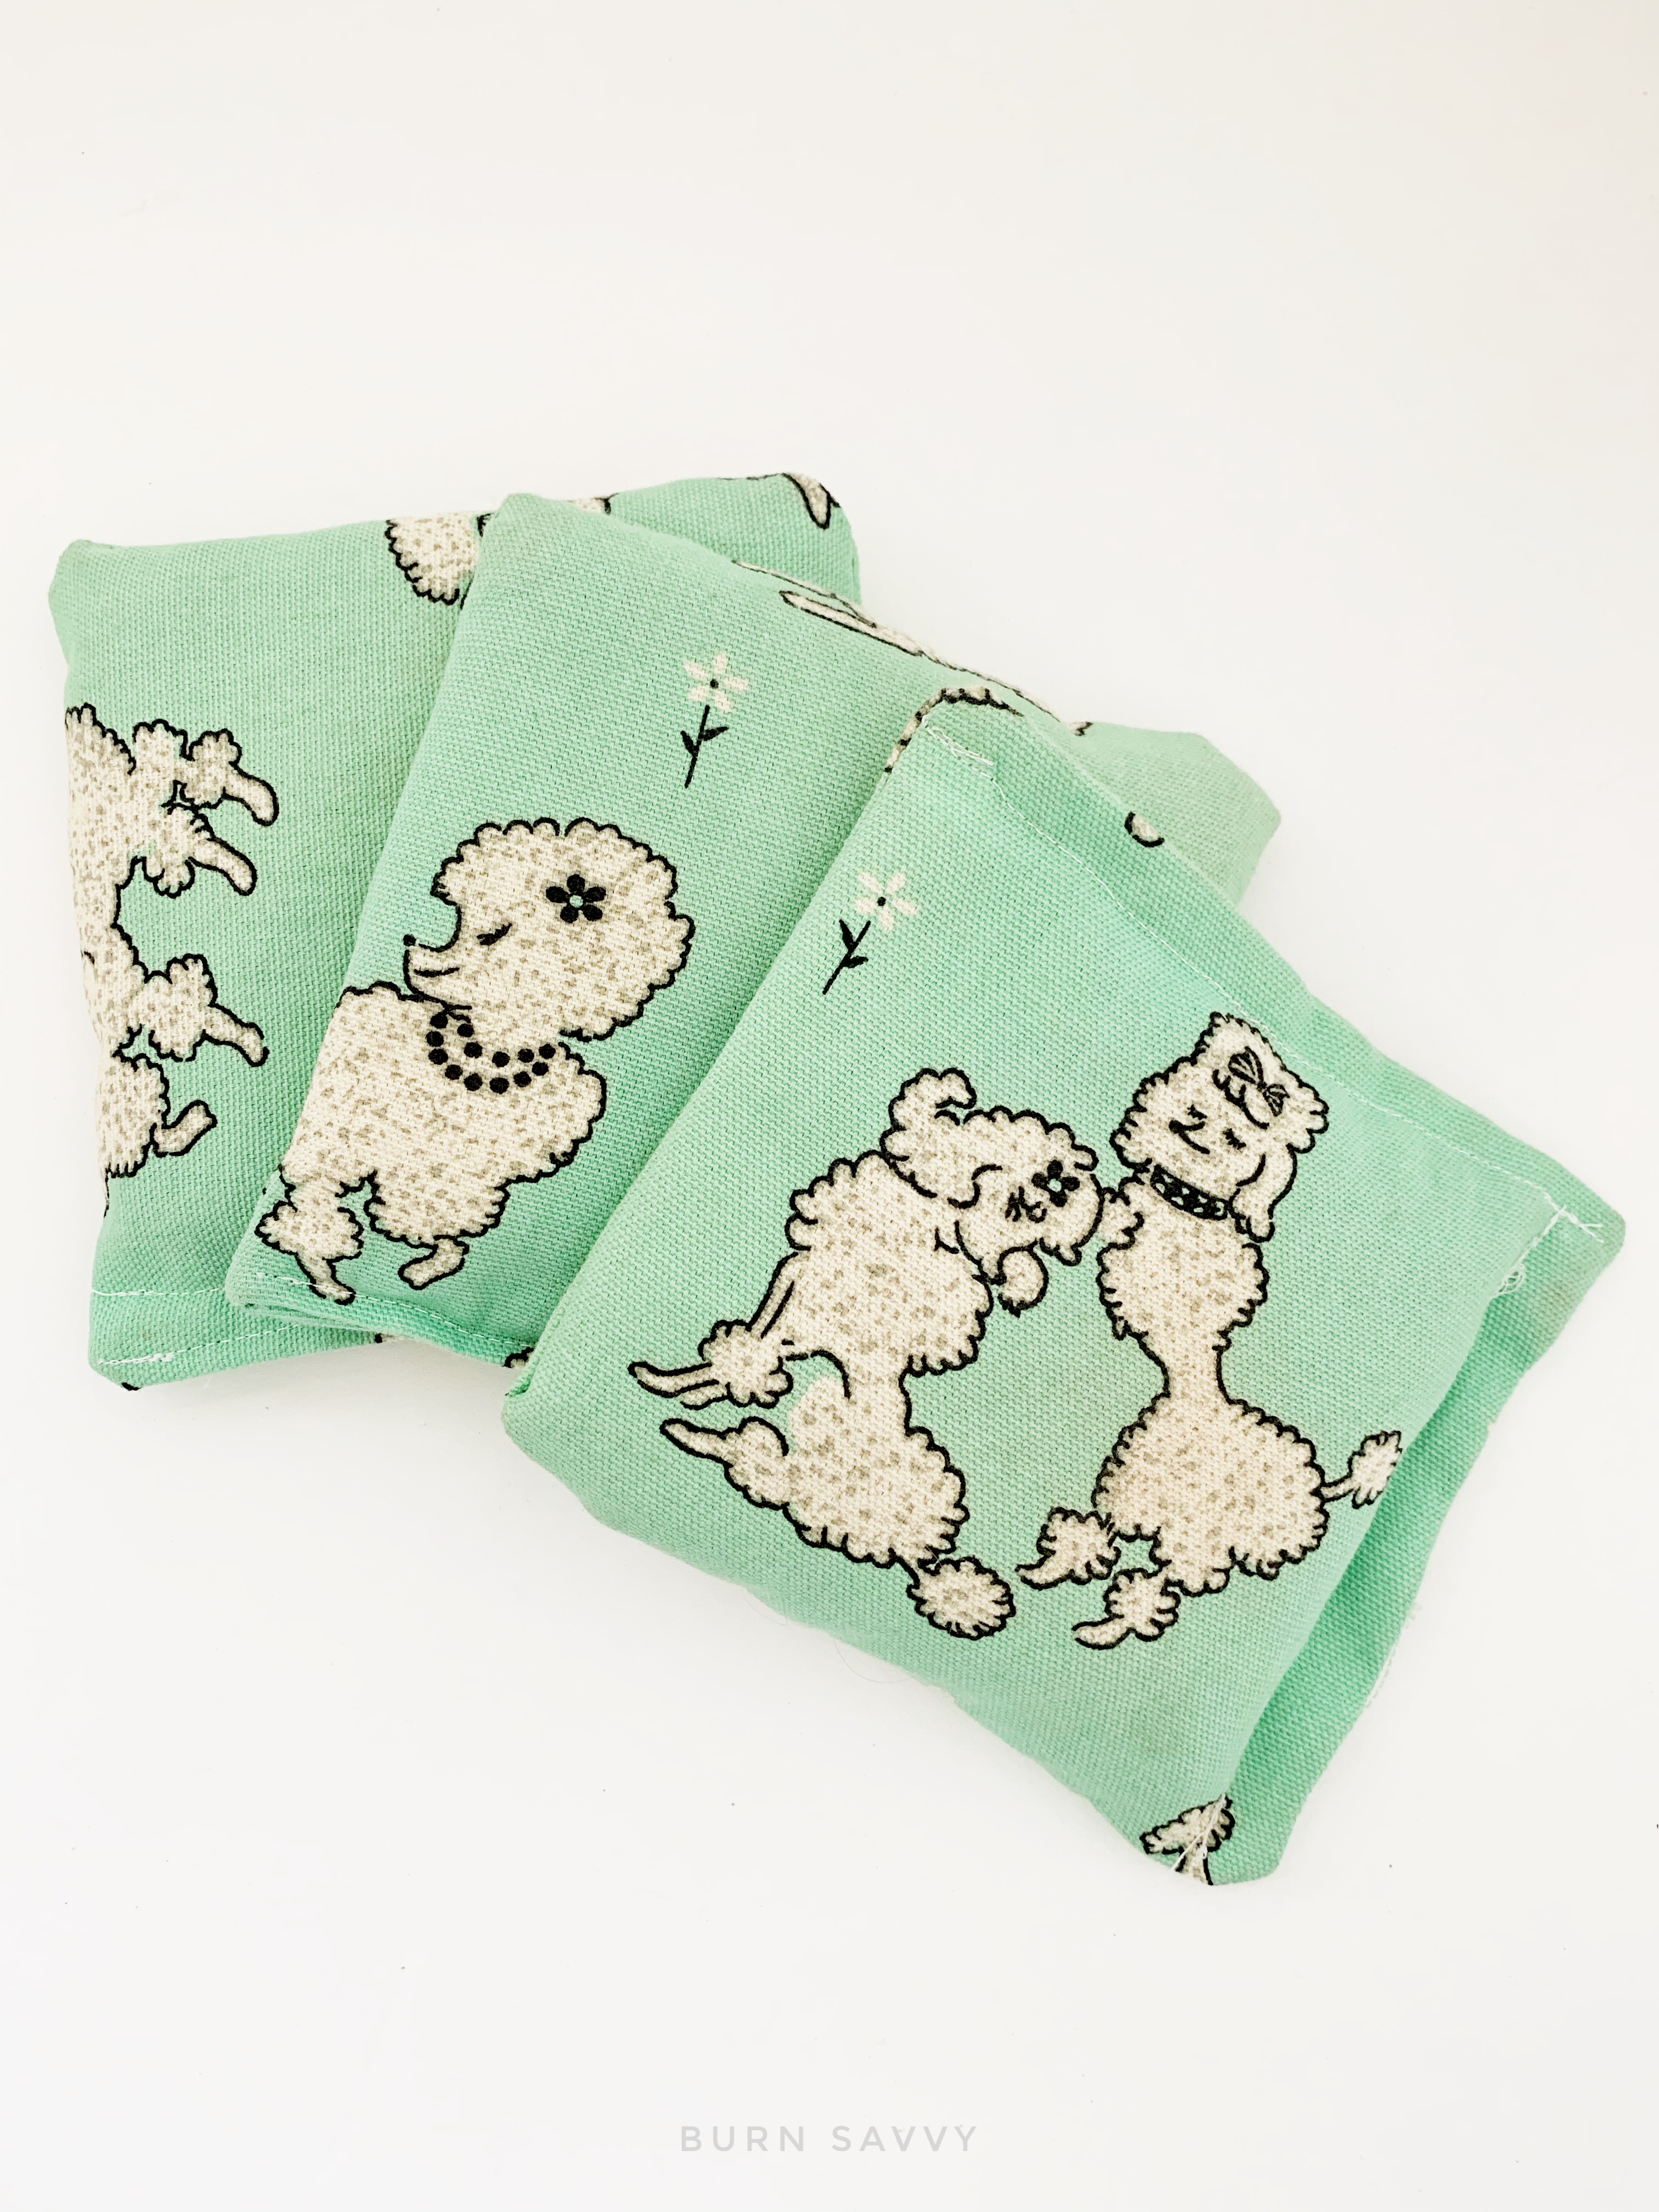 These bean bags were sewn courtesy of my darling daughter *proud mama* These bean bags were sewn courtesy of my darling daughter *proud mama* |
4. Bean BagsI use these to prop my hand up to the same level as the wood piece I'm burning. Sometimes I’m working on a 2 inches thick piece and there’s just no good place to rest my hand [can you say major *artist cramp*]. You can prop your hand up on your pinky to level your hand with your wood. But I promise your pinky will complain after a while. You can use other things to prop your hand up, like a box or another piece of wood. But I find the bean bags are simply easier to move around quickly and form to my hand nicely wherever I place them. I keep about 4 bean bags on hand, although I typically only use 2. Where To Buy: |
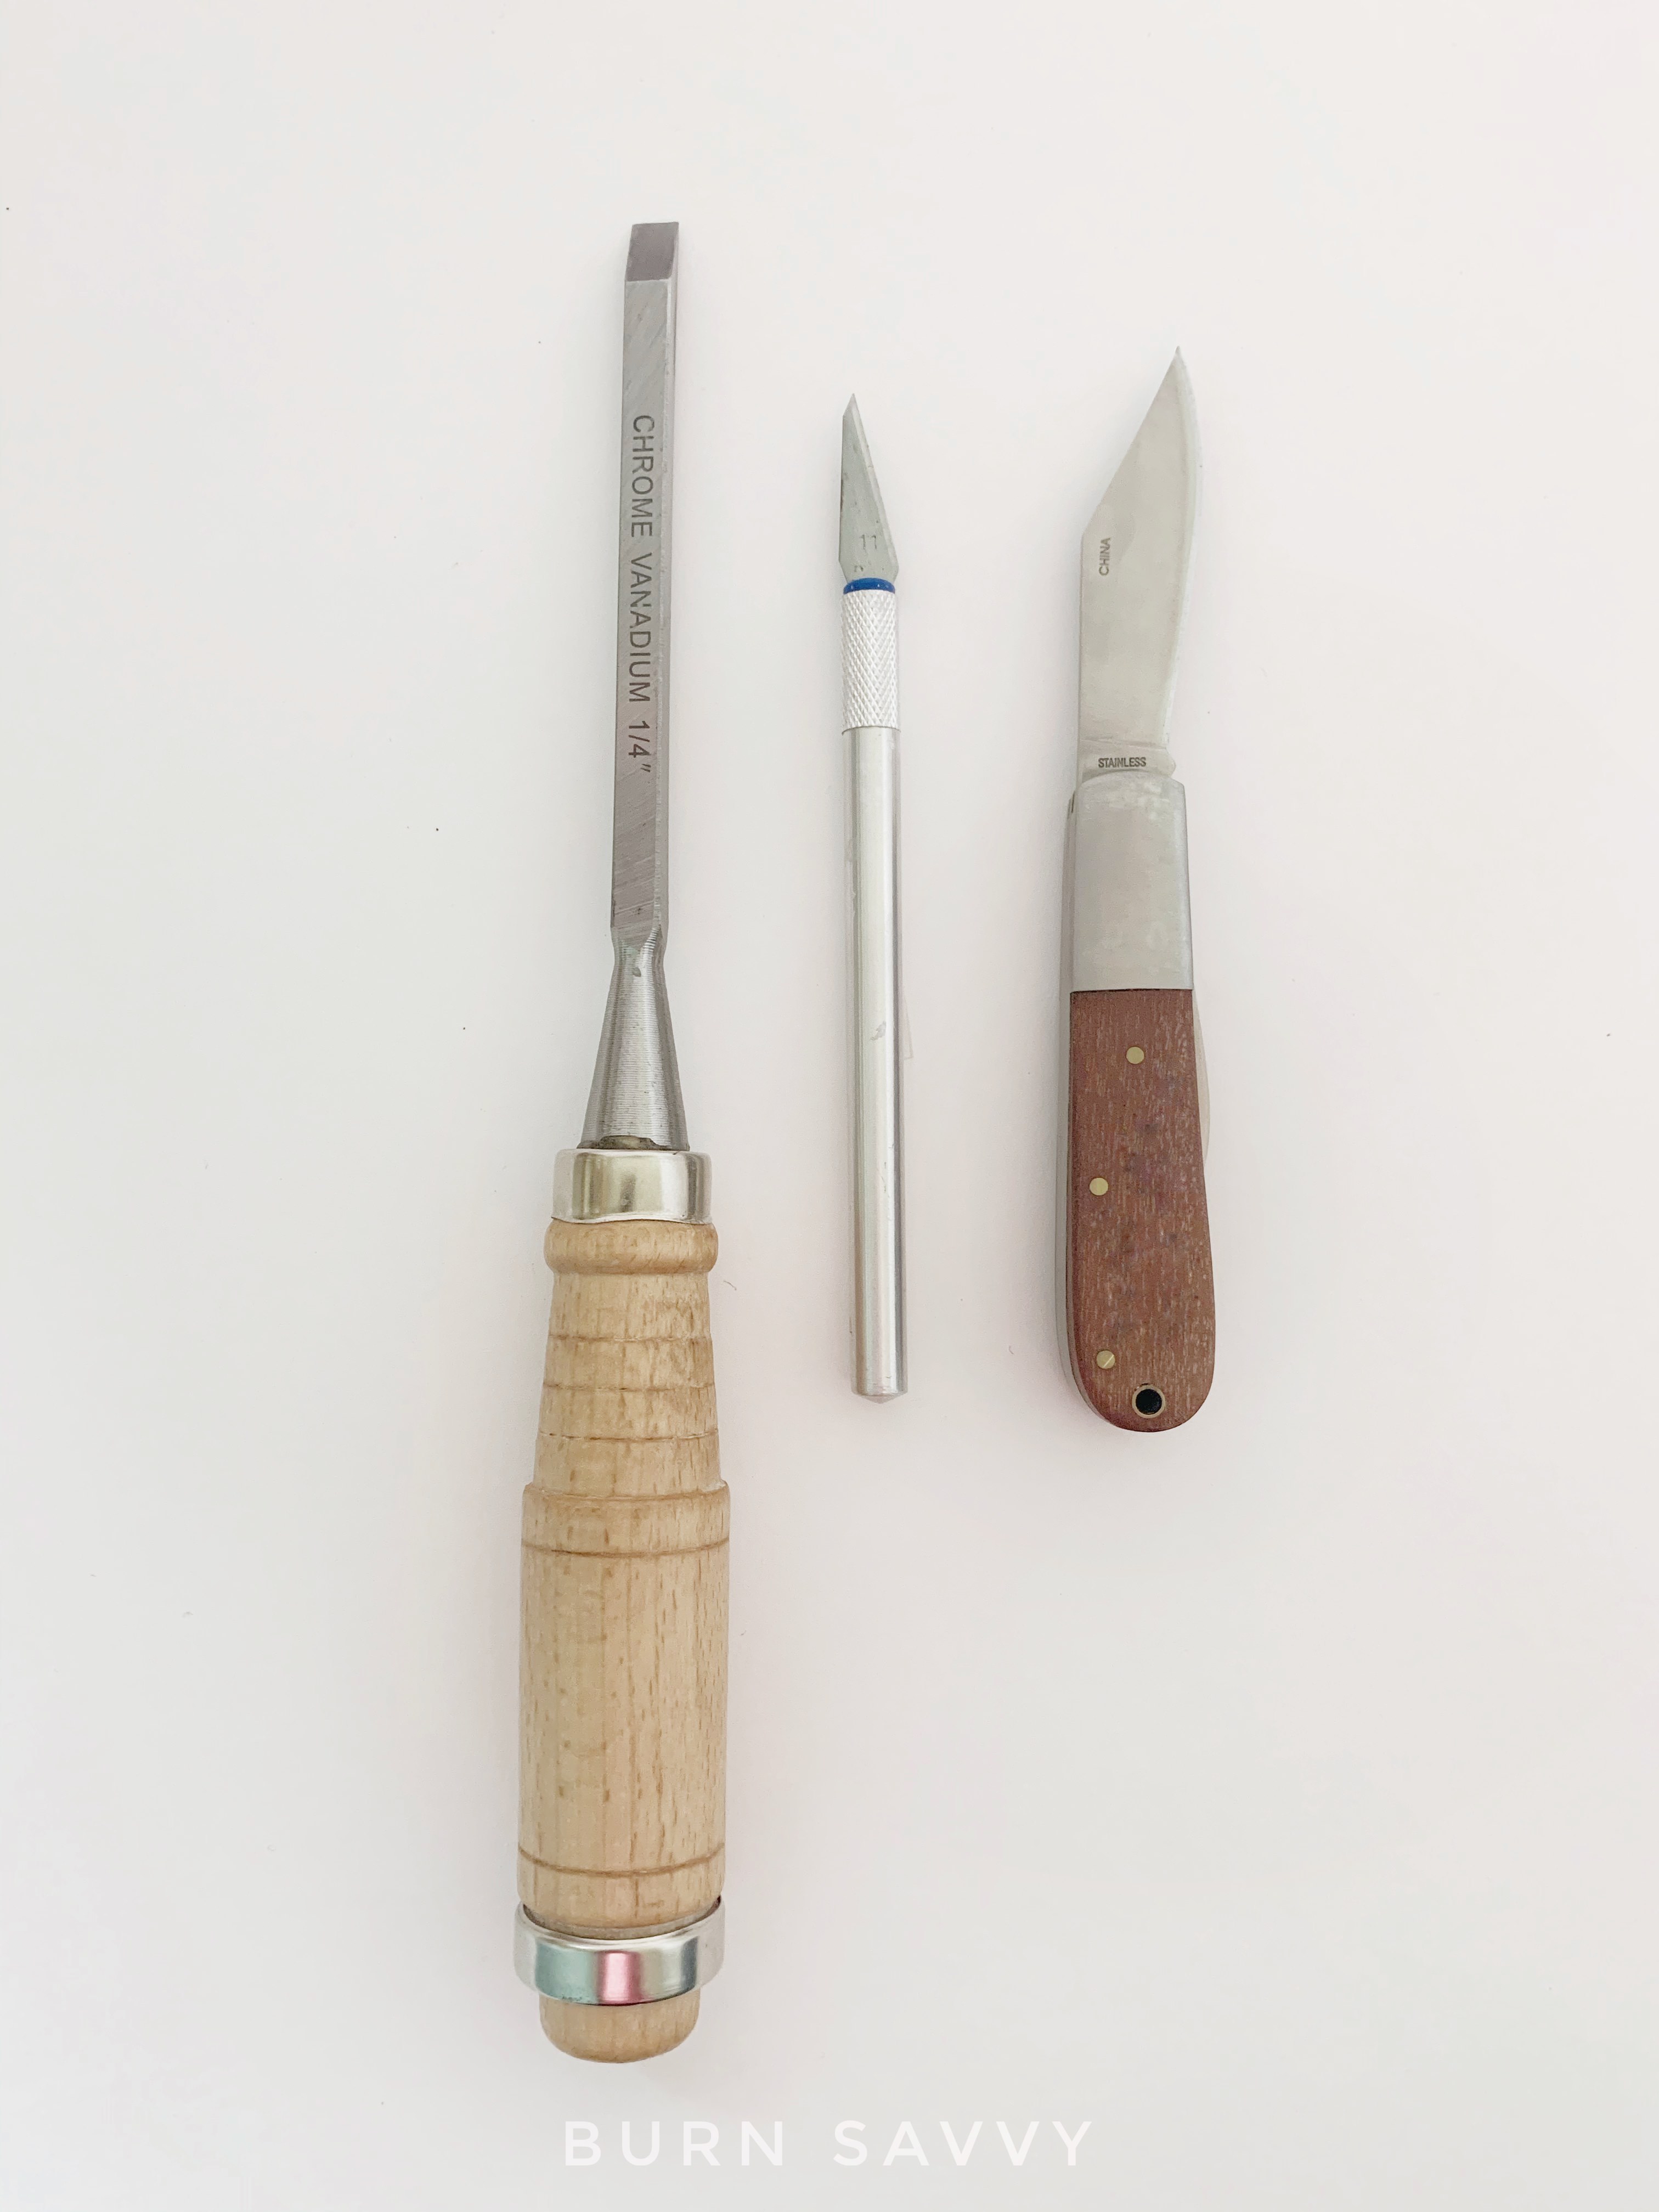
5. Razor Blade, Small Knife, or Chisel
Pyrography mistakes. Ever made one?
The wood may never forgive you.
But one of these little tools (and possibly some sandpaper) can change all that.
I’ve used razors and small knives to scrape off dark burns and make them lighter, or even just to add texture to my piece by bringing the natural wood back to the surface.
Now for the most severe tool – the chisel.
“But Jannie, a chisel sounds so… serious.”
Yep. Serious business. For serious mistakes.
I once signed a piece in a place that I really regretted. After about 2 days of moping over ruining my beautiful art piece, I decided to fix it.
The signature was deep and unforgiving. But once I chiseled down deep enough (being extra careful to blend out the dig site), I was able to use my fine 220 grit sandpaper to smooth out the dent and blend in a new burn.
Bonus Wood burning Tool LIst
These are not necessarily must-haves. But they definitely make pyrography life easier.
6. SandpaperTo smooth your wood before burning and to clean up after you burn. I never used to sand before burning. Too much work! But when I learned it was actually less work to burn a smooth piece of wood, I repented. Now I sand before every burn. I start with 80 grit to get the big nasty stuff off. But I finish with a 220 grit for a buttery smooth surface (finer sanding and your finishing sealant might not adhere). This is also excellent for cleaning up any "glow" that you don't like from a burn or erasing small mistakes. Big mistakes need the tools listed in #5. *Don't tell... I used to cheat and use sandpaper to quickly clean my wood burning tool. But there are much better cleaning tools, which leads me to... |
 |
 |
7. Cleaning ToolsA clean tip burns faster and smoother. Choose a couple of favorites and keep them on hand while
you’re burning... then you don't have to use the forbidden sand paper [oooo-oooo]. |
8. SAfety Gear
Don't skip this. Everything about pyrography – from holding a hot pen to breathing in smoke or fumes – has the potential to cause long term damage. Do not get damaged. Choose what works best for your space, your tools, and your own personal health. Then USE them. Get your hands on this FREE Safety Tips & Tools guide right here! 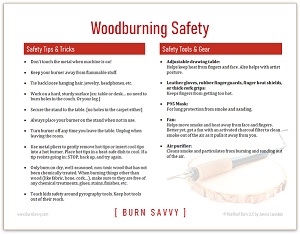 |
 |
Burn Savvy Home > Best Pyrography Tools > 5 Wood Burning Tool Must-Haves That Are Not Burners
Want to seriously up your pyrography game?
I'm spilling my pyrography secrets. Don't miss out on...
- Your FREE guide to woodburning tips & their uses
- Helpful tips, hacks & articles
- First dibs on upcoming courses
- Notice of retreats, challenges, and other pyrography events
- and so much more coming!
So go ahead. Subscribe. Consume. Enjoy.
You deserve it.
⇣ Enjoying your FREE pyrography tips & techinques? ⇣
I am delighted you find them helpful!
If you want some easy ways to give back, here are some ideas that also help YOU level up YOUR wood burning game...
- Watch my YouTube videos (that's totally FREE).
- Buy your woodburning products through my affiliate links which throw me a dime or two at zero extra cost to you (read about affiliate links here).
- Take the pyrography courses that I've poured my heart and soul into helping you burn like a boss!
- Join in the woodburning retreats - that's really like giving back to yourself, actually. ;)
Thanks for helping me keep creating free, delightful, and helpful woodburning content for YOU and pyros like you.