Woodburning Tips:
The Smooth Burning Flow Point
Of all the woodburning tips in your solid-point burner kit, the flow point is the smoothest tip of them all.
It just glides over the wood. So satisfying.
But it can't do everything. I'm going to show you how the flow point handles all of the main pyrography techniqes.
Want To Learn How To Wood Burn?


Courses are now available on the Burn Savvy YouTube channel membership!
Go see which level suits YOU best. ⇣
Flow Point Features
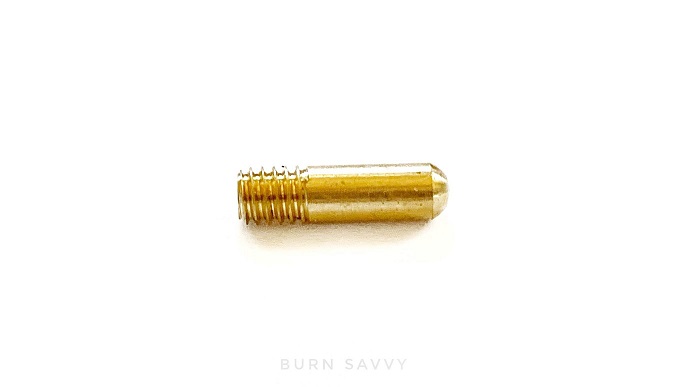
The end of this tip is pretty blunt and gently rounded. It feels like writing with a typical office bullet-tipped marker.
[Not sure what that is? Here's a pretty picture for you.]
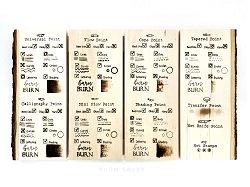
Did I tell you I made a Board?
I used all the woodburning tips on a basswood board to see which techniques were the easiest, what took some work, and what was a downright pain with each tip.
I give you a sample for the flow tip from the board down below.
Download the FULL board of solid-point woodburning tips and their uses for FREE when you sign up!
 Woodburning Tips & Their Uses
Best Uses:
What I love About The flow Point
First of all, I love how fluid it feels when you're burning. Soooooo smoooooth.
As for techniques that it handles beautifully... that's most of them.
- Lines - both curved and straight
The lines are thicker - the that marker I told you about. But they're pretty even and easy to control.
- Circles
Circles take more of a steady hand than simply curved lines, but the flow point makes it feel easy.
- Dots
This is one of the better woodburning tips for stippling and pointillism. You can get a good variety of sizes and it's easy to make them evenly sized.
The larger dots tend to leave a "glow". If that bothers you, just turn your heat down and take more time burning your large dots.
- Curved lettering
It handles curved letters nicely. You don't get as fine or crisp of a line as say the mini flow point or shading point, but those curved letters definitely look smooth.
What's Okay About It
- Block lettering
Again, if you don't care about crisp lines this does block lettering pretty well. The bigger the lettering, the better this tip would work for it.
However, I prefer those crisp lines for block lettering. So I'd have to say use a point with a sharper edge - like the universal or mini universal points or the calligraphy point.
What's Annoying or Hard
- Shading
Shading is tough with this one, but I guess in a small space it could work.
I'd choose a different tip for shading though.
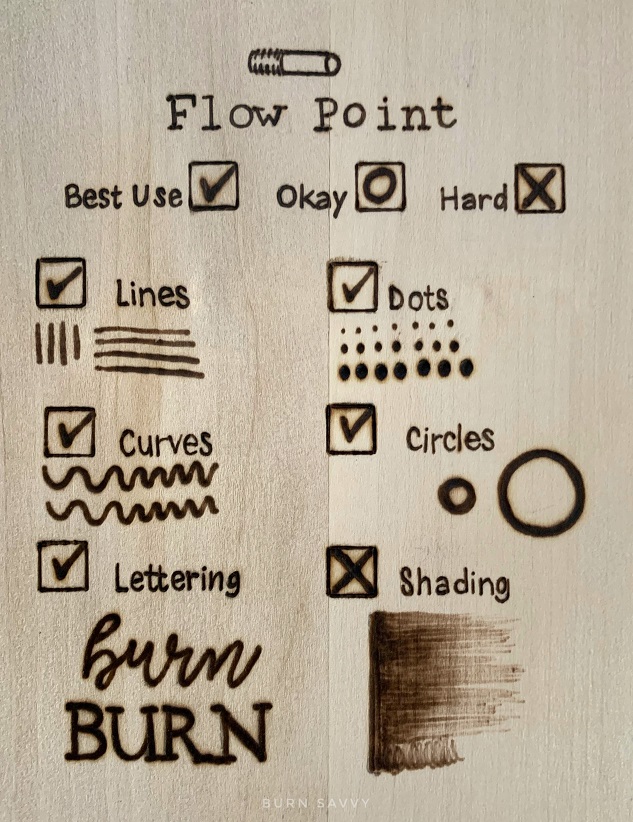
Quick View:
Flow Point Uses
Best Uses
- Lines - curved and straight
- Dots
- Circles
- Curved lettering
Okay Uses - not the easiest
- Block lettering
Hard Uses - choose a different tip
- Shading
Download the Board of Woodburning Tips & Their Uses Free
If you found this helpful, you'll love seeing the whole experimental board in one big picture.
⇣Sign up down there get FREE exclusive access to this board of woodburning tips and their uses.⇣
Burn Savvy Home > Woodburning Tips & Their Uses > Flow Point
Want to seriously up your pyrography game?
I'm spilling my pyrography secrets. Don't miss out on...
- Your FREE guide to woodburning tips & their uses
- Helpful tips, hacks & articles
- First dibs on upcoming courses
- Notice of retreats, challenges, and other pyrography events
- and so much more coming!
So go ahead. Subscribe. Consume. Enjoy.
You deserve it.
⇣ Enjoying your FREE pyrography tips & techinques? ⇣
I am delighted you find them helpful!
If you want some easy ways to give back, here are some ideas that also help YOU level up YOUR wood burning game...
- Watch my YouTube videos (that's totally FREE).
- Buy your woodburning products through my affiliate links which throw me a dime or two at zero extra cost to you (read about affiliate links here).
- Take the pyrography courses that I've poured my heart and soul into helping you burn like a boss!
- Join in the woodburning retreats - that's really like giving back to yourself, actually. ;)
Thanks for helping me keep creating free, delightful, and helpful woodburning content for YOU and pyros like you.